0. Contents of This Article
This article covers interaction with controllers and pointers (Ray) in Meta Quest. Specifically, it explains the procedure for detecting Hover (pointing) and Selection (click) using Ray. You can confirm the operation in the sample provided on GitHub, in the 05-RayInteraction or 05-RayInteraction-AR scenes.
*This video is for AR, but it supports both AR and VR.
It should be noted that this article assumes manipulating the cube displayed in VR or AR scenes created with the following links. Since it starts with just viewing the cube in Quest without adding any special components to it, you can achieve object manipulation in other projects by following the content of this article and subsequent articles. (Assumes the use of OVRCameraRigInteraction prefab instead of OVRCameraRig)
[VR Version]
[AR Version]
1. Duplicate the Scene
It is possible to edit the scene created in the previous article, but to avoid breaking it while trying object manipulation, duplicate the scene. Skip if not needed.
- Open the VR or AR scene created in the previous article
- Click File -> Save As...
- Save the current scene with a new name
* In this article, it will be named RayInteraction - Ensure that the scene name displayed in the Hierarchy is RayInteraction
2. Enable Object and Ray Intersection Detection
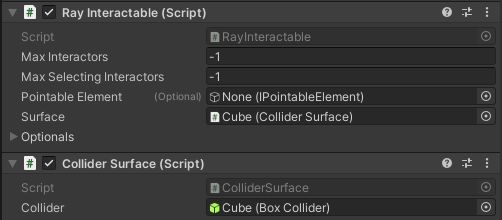
To achieve interaction with Ray, add a script to detect interaction with Ray to the object.
- Select the target object (Cube) in the Hierarchy
- Ensure that the Cube details displayed in the Inspector have a BoxCollider applied
* For objects other than Cube, use colliders appropriate to each object
* For self-made models, add colliders manually - Click the Add Component button at the bottom of the Inspector
- Type Interactable in the search area
- Select Ray Interactable from the displayed candidates
When Ray Interactable is added, the Surface item is set to None. This item is required because it registers the shape for intersection detection with Ray Interactable.
- Click Add Coponent below Cube's Inspector
- Search for Collider and select Collider Surface
- Drag and drop Cube onto Collider Surface
* Use Cube's collider shape for intersection detection - Drag and drop Cube onto Surface in RayInteractable
* Register the shape information (Surface) created above with RayInteractable
3. Receive Events for Interaction with Ray
Now that the preparation for interaction with Ray is complete, add the ability to receive Hover (pointing) and Selection (click) as events.
- Select Cube in the Hierarchy
- Search for Interactable from Add Coponent below Cube's Inspector
- Select Interactable Unity Event Wrapper
- Drag and drop Cube onto Interactable View in Interactable Unity Event Wrapper
* Registers Ray Interactable and connects it to the firing of Hover and Select events
4. Confirm Ray Interaction Behavior
Now, actually receive events and confirm the operation. This article displays the states of Hover and Select as text.
- Right-click the blank space in Hierarchy
- Click 3D Object -> Text - TextMeshPro
*If TextMeshPro is not installed, follow the instructions in the dialog to install TextMeshPro. (Sample installation is not required) - Change the settings of Text (TMP) as shown below in the Inspector to display text above the Cube

- Focus on TextMeshPro-Text in the Inspector
- Change Alignment to center the text
- Focus on Interactable Unity Event Wrapper in the Inspector for Cube
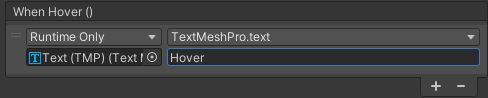
- Click the + next to WhenHover() in the bottom right of the Inspector
- Drag and drop Text (TMP) onto the area labeled None
- Open the dropdown menu labeled NoFunction
- Click TextMeshPro -> string text
- Enter the text you want to display when Hover starts in the text area that appears below the dropdown menu (e.g., Hover)
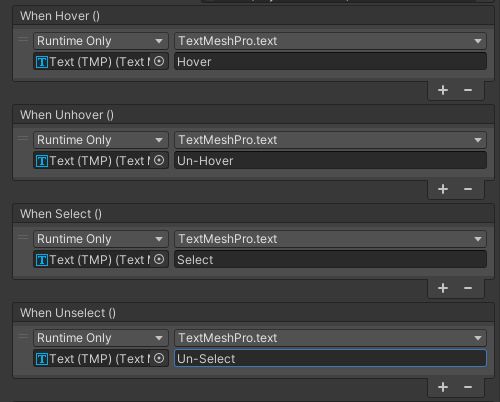
- Following the same procedure, set the text to display for the following events:
When Unhover() : Un-Hover
When Select() : Select
When Unselect() : Un-Select
When you confirm the operation, Hover or Un-Hover is displayed at the start and end of intersection with Ray, and Select or Un-Select is displayed at the start and end of pinching with your fingers or pressing the trigger of the controller, as shown in the video at the beginning.
5. List of Articles on Meta XR SDK